
Are you planning a trip to New Zealand but don’t know where to begin? Look no further than this comprehensive guide to exploring the country by campervan.
Based on my personal experience, I can honestly say that seeing the country by campervan is one of the best ways to explore. You will definitely have an adventure of a lifetime. Having a vehicle in New Zealand will give you the ability to explore less travelled places that are difficult to get to by bus or other modes of transport and the freedom to stay longer in your favourite spots.
New Zealand is notorious for campervan or motorhome rentals because it is the easiest way to hit all the major spots. Due to its popularity, campervanning in New Zealand is big business. Navigating campervan rentals can be a challenge for travellers new to the country.
It may be overwhelming, as you start planning and researching campervan trips because there is so much to see and do in New Zealand and having a good road map will relieve some of the day-to-day stresses. After successfully campervanning in New Zealand for just over three weeks, I am eager to share my experience and guide you on making the best decisions for your upcoming trip! Get ready to have the most memorable experience!
I have created this comprehensive guide that breaks down everything you need to know about campervan planning to New Zealand including: budgeting, deciding what campervan company to go with and our go-to resource for finding campsites.
Our campervan story
Before I get into the guide, I wanted provide you with a bit of background about why you should trust my advice. Prior to campervanning through New Zealand, my boyfriend, Kevin and I did a 2.5 week campervan road trip from Cairns, Queensland to Byron Bay, New South Wales. We travelled over 1,500 kilometres in a span of 2.5 weeks and basically made all our mistakes during this trip. Before our road trip in Australia we had no previous knowledge about campervanning and I spent a lot of time researching travel blogs about how to best explore New Zealand.
By the time we arrived in New Zealand we knew exactly what to do the second time around.
Why a campervan is the best way to see New Zealand…

Still not convinced about what makes travelling by campervan so great? Here are at least five reasons why:
- Save Money: While renting a campervan still isn’t necessarily cheap, it will give you the opportunity to save money in other ways: like cooking your own meals and finding free campsites. Combining our transportation and accommodation was the reason we were able to spend almost a month there. New Zealand is not a cheap country to visit and you really have to be conscientious about how you spend.
- Adventurous & Memorable: Choosing where and what view you’ll be able to wake up next to (believe me there are some epic ones) is so much fun. Waking up to new and exciting views and landscapes is incomparable to staying in hotels. There are also so many adrenaline activities that you can do across the country such as bungee jumping, sky diving, luging, zorbing, white water rafting etc…These activities tend to be very expensive and require budgeting in advance.
- Less Planning: Campervan roadtrips are simpler than booking hotels and requires less planning. Unless you are staying in or near a major city during the busy season there is no need to reserve campsites in advance and you have the freedom to drive however long you want each day. You can also make meals when you get hungry instead of relying on restaurants.
- Discover More: New Zealand offers plenty of opportunities to camp near popular trails so you can get to your hikes before the crowds. Being able to drive at your discretion without rushing back to your hotel allows you to see more places and get to places that are off-the-beaten-path.
- Campervan Friendly: New Zealand is well set up for campervans. There are campgrounds and freedom camping sites throughout the entire country, making it simple to navigate your next move. There is an app called, Campermate used for travelling around New Zealand and Australia. The app is free and uses GPS to find nearby Points Of Interest such as public toilets, dump-stations, accommodation, rubbish bins, local travel tips and more.
I’m hoping by now I’ve convinced you to consider campvervanning, it’s time to start planning!
Best time to visit New Zealand
The “best” time to visit depends on your personal preference.
TIP: If you have some flexibility in your schedule, it’s worthwhile checking in with your campervan company to see if it’s cheaper to travel during the cooler months. For us personally, it was about $1000 cheaper to rent a campervan in March compared to February. It’s a great way to save money!
Spring (September – November)
Weather usually varies from nice and warm to cold and rainy. The lupin flowers around Lake Tekapo are in full bloom and make for a stunning photo op. Prices and crowds are average at this time of year.
Summer (December – February)
This time of year offers the best chance of good forecasts even though it’s best to prepare for unpredictable weather. However, high season means crowds and higher prices.
Fall (March – May)
Weather is typically nice, and summer temperatures are starting to drop. Prices and crowds are average at this time of year. In addition to it being more affordable to travel in the fall, we started our trip on March 2. The weather was sunny majority of the time and generally warm during the day. It tended to cool down quite a bit during the night so warmer layers are something to consider packing.
Winter (June – August)
The South Island can get quite cold but you’ll find few crowds and low prices. Additionally, the South Island has many spots that are renowned for skiing, so if you’re into winter sports, this might be the preferred option for you.
TIP: Campervan rentals are cheapest during the winter time.
TIP: Wearing sunscreen whenever you’re outside is also strongly recommend as there is little to no ozone layer and burning through the clouds is a very real reality.
How much time do you need for a campervan trip?
So how much time do I really need?
It’s possible you could spend months savouring each spot and doing the overnight trailheads and other scenic hikes. However, there are some travel restrictions to keep in mind before you enter New Zealand. As of October 2019, Canadians visiting New Zealand for stays of up to 90 days are required to carry a valid New Zealand Electronic Travel Authority. Visitors need to complete the New Zealand eTA application form online by answering a series of basic questions and submit relevant documents. I’ve linked the application form for you to have a look.
TIP: It’s also worth noting that you cannot book a one way ticket to New Zealand. Before you check into your flight to New Zealand you are required to show proof that you have a flight out of the country within 90 days. Make sure you have an idea of when you are planning to leave.
Here are some realistic time frames for you to consider what’s best for you:
- 2 weeks or less in New Zealand will feel very rushed and you will have to choose your destinations very carefully. I’d recommend visiting just one island if you’re this pressed for time.
- 4 weeks allows you to be able to see a lot of the “big sites” on both the North and South Islands, as well as some places off the typical tourist path. You would also have some time to do hikes during the day.
- 6 weeks would allow you to explore some of the more remote areas of the country with a little time for relaxation.
- If you have more than 6 weeks, you’ll still have no problem filling your days with things to do.
We had 23 days in total and found that this was a comfortable amount of time to see both the South and North Islands without doing any major overnight trailheads.
Choosing the right campervan in New Zealand
In New Zealand a “campervan” covers a range of vehicles, from small converted mini-vans that sleeps two people to a large family-sized motorhome and RVs full of amenities.
Although not all campervans are created equal, they tend to have a couple things in common. The main features of most campervans for hire in New Zealand are at least one bed and a kitchen of some sort – meaning you can stay at campsites and cook a lot of your own meals.
Researching campervan companies can be overwhelming at first because there are so many options to choose from. Here are a few questions you can ask yourself to help you choose the right campervan for you and your trip:
- How many people are you traveling with? The smaller campervans in New Zealand will only sleep two adults comfortably, while the larger ones can accommodate four adults or even a family of 5. Figure out how many people you’re traveling with, and then look for campervans with corresponding berth space.
- How large of a vehicle are you comfortable driving? This is really important to consider because New Zealand’s roads are notoriously narrow and winding, making it more challenging to drive a large vehicle. Larger vehicles have less maneuverability and slower speeds taking a lot longer to reach your destinations.
- Do you need a self-contained vehicle? When we were researching campervans we wanted to opt for low budget vehicles. Our thought was, we are trying to save on accommodation by renting the campervan and so staying at pricey holiday parks seemed counterproductive. There are pros and cons for both but the biggest con of a choosing a self-contained vehicle is price. The cost for this type of vehicle was several hundred dollars more expensive but also gives you the ability to freedom camp and stay at DOC sites. We opted for a non self-contained vehicle which meant we had to research free camp grounds for non self-contained vehicles.
- What’s included? When pricing out campervan options, you need to consider a lot of different things. What “extras” do you value more? Does the company charge extra for things like one-way rentals or adding an extra driver? Do they include insurance cover in your quote? (We highly suggest taking the full insurance coverage!) Do they include bedding and towels?
Self-contained vs non self-contained campervans
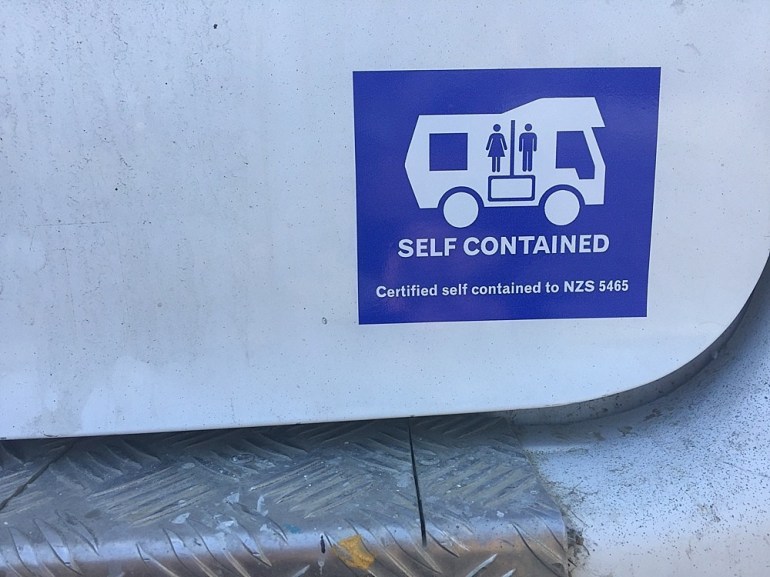
Certified Self Contained:
Vehicles that are self contained will have a blue sticker on the rear of the vehicle below and a sticker on the inner windshield. A self-contained campervan is a vehicle that can function without outside resources. Certified motorhomes include a toilet and water container that holds greywater (from the sink and shower) and septic waste. This means you do not require toilet facilities when you park up overnight somewhere.
Non Self-Contained: Non-self-contained campervans, on the other hand, do not have their own contained waste and sewage facilities. Freedom camping is prohibited unless you want to get fined. They’re also smaller in size and are less spacious. The biggest downside to non-self-contained campervans, is that you can’t take them to freedom camping sites.
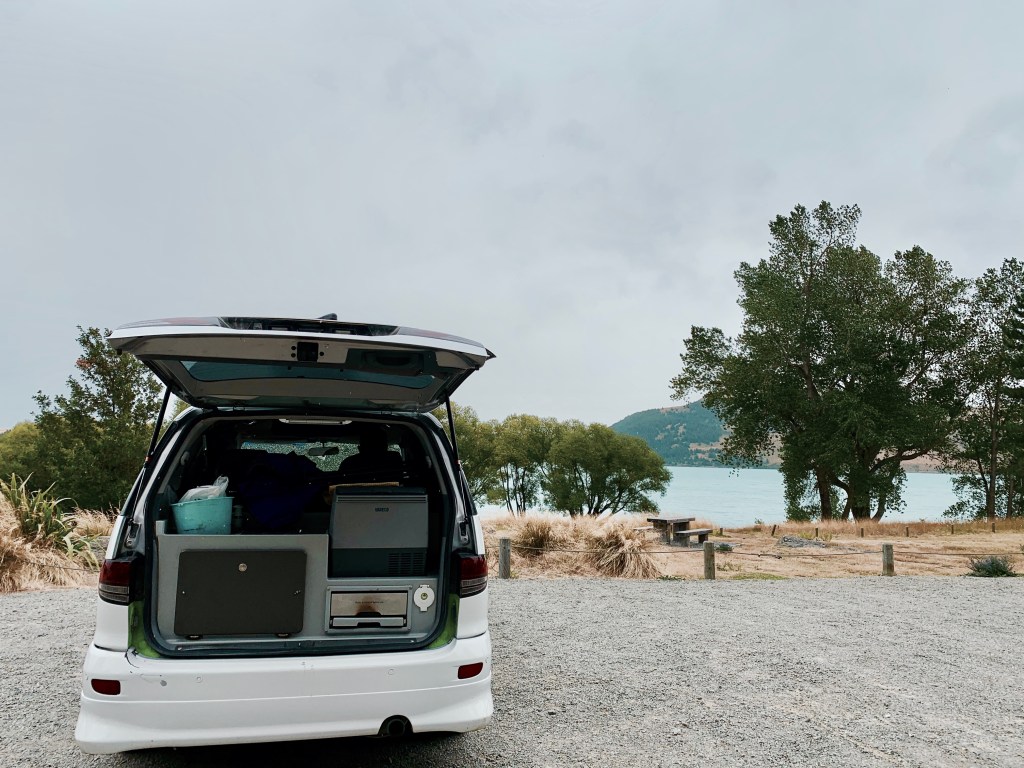
The campervan we chose
Kevin and I ended up renting our van through Lucky Rentals, a company that hires out mini-van-sized campervans ideal for couples. We went with their Lucky Rodeo for our 3-week trip from Christchurch to Auckland. The Lucky Rodeo is still a 2 Berth automatic Toyota Estima but features a double bed, kitchen, fridge and a dual battery system. We also picked the full insurance coverage option.
The pros of renting the Lucky Rodeo included:
- It drove like a regular car – our Lucky Rodeo wasn’t super big, so all those winding roads and tiny parking spots really weren’t an issue for us. It was also regular car-sized, meaning we didn’t have to pay extra to take it on the ferry between the North and South islands.
- It had two separate batteries – one that ran the engine, and another that ran the fridge at night so you could leave the fridge running all night.
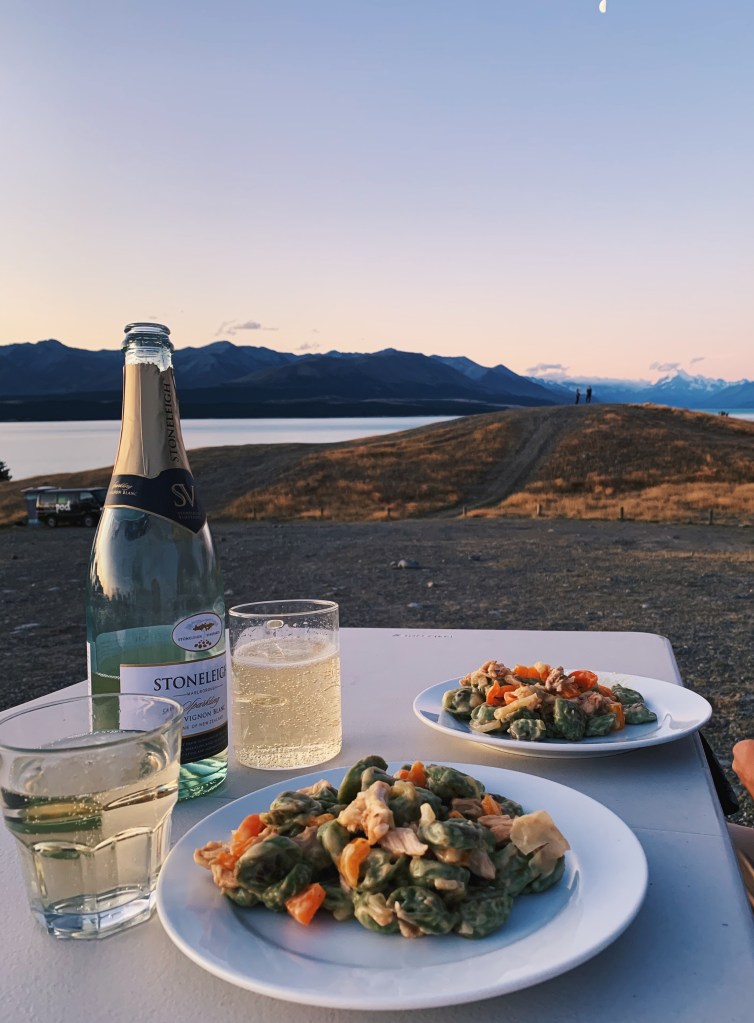
- We were able to eat inside – the seats converted into chairs and we had a table we could set up to eat inside. This was handy because there were a lot of bugs at night or for whenever it was too windy or rainy.
- Nearly everything was included – when we were in the process of booking we negotiated some extras that were added for free such as towels and bedding, cooking utensils and plates. We also had unlimited kilometers and there was no fee for picking up in one location and dropping off at another. We also had a table and camp chairs so we could eat meals outside the car too.
The cons of renting a Lucky Rodeo included:
- Space inside – The van was a converted Toyota mini van, with the back section converting into our bed each night. To make up the bed, you had to move the seats all the way forward – and even then the bed wasn’t really ideal for anyone over 6 feet tall.
- Storage was a bit awkward – There was plenty of storage for our bags underneath the bed, but when setting up for sleep we had to put all our stuff on the front seats each night and made it difficult to get items when the bed was made.
- We did not have enough charging ports – It was really challenging to charge our electronics with only one USB port in the entire vehicle.
- Our cookware was in poor condition – We had to buy a new frying pan because the one they provided was unusable. They also forgot to include a chopping board / dish soap. This is something we regret not checking before we left the rental place.
Overall, this van was the right one for us. We didn’t really need a self-contained vehicle since we stayed in a few holiday parks, and looked for free campsites for non-self contained vehicles. We liked that it drove like a car so parking was easier and we didn’t have to pay extra for our ferry.
If you’d like a full tour of the Lucky Rodeo, check out this video:
Check out all the details for renting a Lucky Rodeo here. Lucky specializes in affordable compact vans like the one we rented.
Additional Campervan rental companies
Budget
 |
Mid – Range
 |  |
 |  |
High-End
 |  |
How much do campervans rentals cost in New Zealand?
The time of year can affect the price significantly. If you are traveling in the peak summer season (December – March), expect to pay peak rates. Shoulder seasons (before and after peak season) will likely be neither crazy expensive nor super cheap.
Estimated prices:
- Peak Season (Dec to Feb): $120 – $420 NZD per day ($100 – $350 CAD)
- Low Season (June to Aug): $30 – $120 NZD per day ($25 – $100 CAD)
- Shoulder Seasons (any other time of year): Expect to pay somewhere in the middle
We rented our van for about $60 CAD per day from March 2 – 22.
Additional Costs: Unfortunately staying at free campsites comes at a cost: infrequent showering. So unless you plan on not showering during your entire trip your daily rate will go up a bit when you factor in campsite costs.
TIP: How much do you expect to spend per day? Now multiply that by how many days you plan to travel in New Zealand.
Breakdown of our costs
Here were some of our campervan trip costs (prices are based on two people):
| Expense | Description | Cost (NZD) | Cost (CAD) |
| Lucky rodeo rental | 21 days (with full insurance cover) | $1,960 | $1,665 |
| Gas | Gas is expensive – like really expensive. It’s approximataly $2.3 NZD / litre | $786 | $557 |
| Ferry | Interislander Ferry from Picton to Wellington (2 adults + van). This was a non-flexible ticket fare and the cheapest option. Keep this in mind when you plan your itinerary. | $235 | $200 |
| Extra accommodation | Includes Airbnb: we stayed in Christchurch (1 night) & Auckland (3 nights) and a few holiday parks | $604 | $512 |
| Groceries | Tip: go to PAK’nSAVE for the cheapest groceries | $833 | $707 |
| Eating Out | Tip: for the best burger visit Fergberger in Queenstown | $410 | $347 |
| Tours / Entertainment | Prices for two people: Milford Sound, Hobbiton, Tongariro River Rafting | $823 | $700 |
| SIM and Data Plan | Skinny Mobile unlimited data plan | $75 | $63 |
| Total (for two people) | $5,726 | $4,751 |
NOTE: Don’t forget to account for your flight cost which is roughly $1,300-$1500 (CAD) per person.
Campgrounds in New Zealand
There are plenty of campsites in New Zealand and there are many camping options to choose from as well as various levels of restrictions for self-contained and non self-contained vehicles.
How to find campgrounds in New Zealand
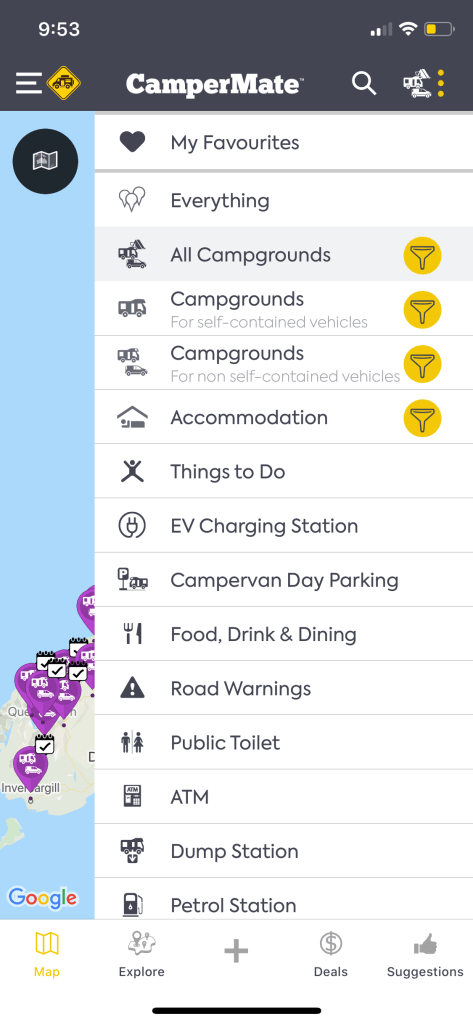
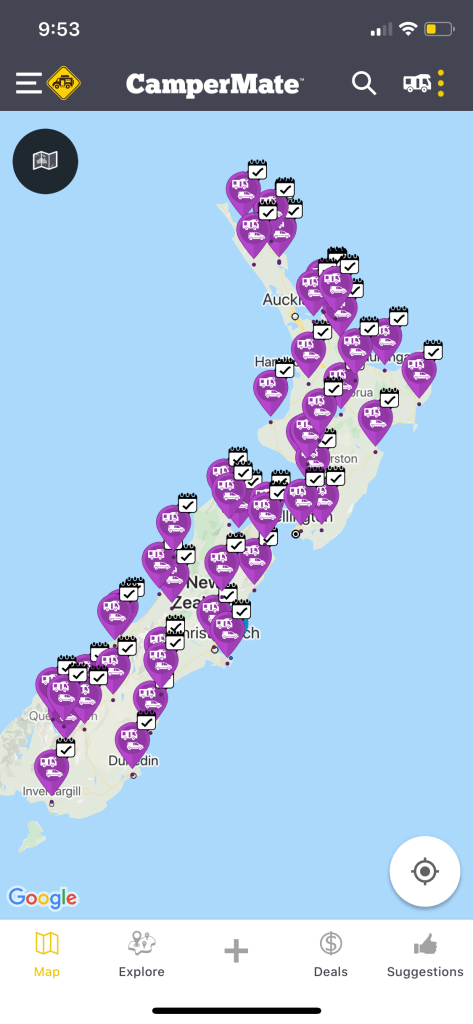
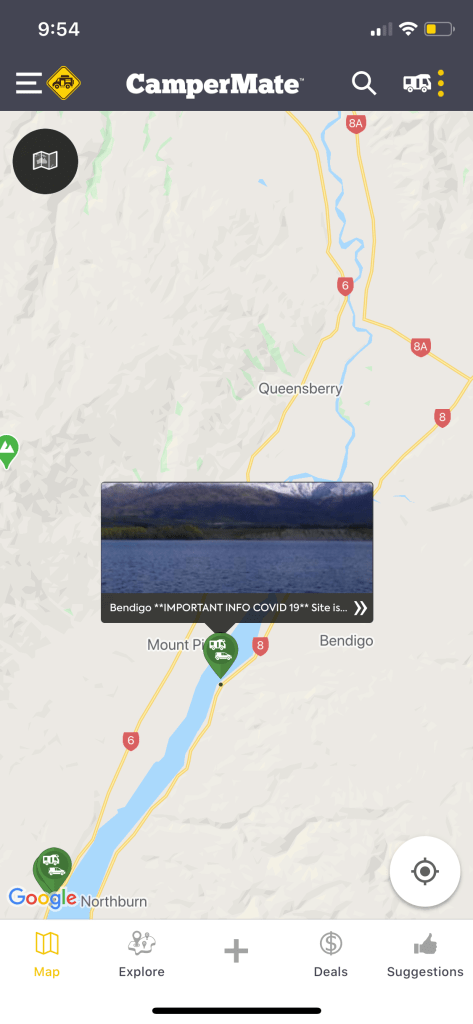
We used CamperMate as our go-to resource for finding campgrounds in both New Zealand and Australia.
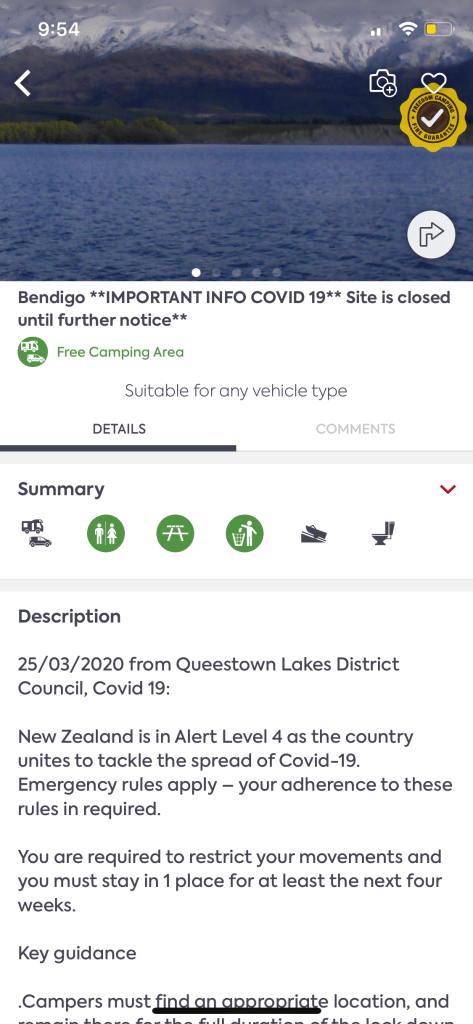
The app shows all types of campgrounds – from the free camping to holiday parks. They also show reviews so you know what to expect as well as any requirements about capacity and other rules of the campsite. You can use filters to find the price range or type of campground you are looking for. I’ve taken some screen shots below for you to see what it looks like.
Types of Campgrounds in New Zealand
There are also a few types of campgrounds in New Zealand and it’s important you know the rules for each. The Department of Conservation (DOC) is very strict about ensuring campground rules are followed – especially for freedom campers.
Holiday Parks
Think of these as the “resorts” of campgrounds. They have all amenities such as: proper toilets, hot showers (sometimes free, sometimes coin operated), laundry machines (coin operated), kitchens equipped with gas stoves and sinks (you typically provide the cookware and utensils, though sometimes it is provided), powered site options (for RVS or motorhomes), garbage facilities. These campgrounds are also more expensive and can vary between $15 to $26 NZD per person per night.
You can usually book holiday parks in advance if you’d like, but unless you’re near a big city or traveling during the busiest time of year, you can usually turn up and find a spot. Just make sure you arrive before the office closes, or you’ll be out of luck. (If you know you’ll arrive late, you can all ahead and reserve your spot.
DOC Campsites
The DOC offers a large selection of campgrounds (more than 200) across the North and South Islands. There are different types of DOC sites, including very basic free sites. These Standard or Scenic DOC campgrounds are typically simple but tend to be in nice locations (many are in or around National Parks). Most of the time they will have toilet facilities and water supplies. Sometimes there are rubbish bins, but it varies.
At most DOC sites, you can not make a reservation in advance, and you will need to pay in cash. You will fill out your information on an envelope in which you will deposit your exact payment. Park Rangers do come around to check this, so be sure to do this as soon as you arrive.
DOC Campground Pass
Although we didn’t invest in the DOC campground pass, you can purchase a weekly pass at the costs below:
- $30 for a Single pass (one adult)
- $60 for a Double pass (two adults)
- $90 for a Family pass (two adults and up to two children/youths)
Read the fine print: Not all DOC sites are covered in this pass. There is a list of all the sites covered in the pass, and some regions don’t have many options. So before buying the pass, look at your route and make sure there are enough approved DOC sites that the pass makes sense.
Also remember that the pass is for anyone travelling in a self-contained rental campervan. We had a non-self contained vehicle so we wouldn’t have been able to stay in these campgrounds anyways.
Free Campgrounds
For the most part we made an effort to locate free campgrounds on CamperMate. Most of the time these were 30-40 minute drives away from major cities. For example in Queenstown, there are no free campgrounds nearby and the closest one we stayed over night was in Bendigo about an hour away from Queenstown. The free campgrounds are what you want to look for if you are non self-contained vehicle and don’t want to stay in expensive holiday parks.
Free campgrounds are typically very basic and only have bathroom facilities. We stayed at some free sites that had clean and well-maintained flush toilets, and others where the outhouses were very questionable.
For the free sites, it’s best to lock down a space earlier because there are limited spots. The CamperMate app provides details about the capacity and any other rules about your stay at the site. For the most part stays range from one – three nights per campground per month.
You can find free campsites by searching CamperMate and using the filter to find only those that are free. You can use the app to check reviews and ensure there are toilet facilities.
NOTE: If there are no toilet facilities, the campsite will fall into the category below.
Freedom Camping
Freedom camping is the last option for campervanning, however it comes with strict regulations. Freedom camping means you are spending the night on public land that has not been set up as a campground (there are NO toilets). It is only allowed in designated areas and is only for vehicles that are certified self-contained (a.k.a. has a toilet and a grey water tank). It is illegal to spend the night in areas that are not designated for Freedom Camping, and you can be fined. Same goes for vehicles that are not certified self-contained. On our third night in New Zealand, we stayed at Lake Tekapo Car Park and we were unaware about this rule. We were approached by a friendly DOC ranger early in the morning who advised us we could not stay there. Using CamperMate to help you identify if a site is right for your vehicle is the best way to be prepared.
How to use dump stations
The CamperMate app also has a feature where it tells you where dump stations are available. Usually most holiday parks have fill and dump stations. Dump stations are used when you have to fill your vehicle with clean water. If you are a self-contained vehicle you will have to dump out the grey murky water.
Since our vehicle was non self-contained it released murky water directly onto the ground, we only had one hose for filling up clean water. Depending on how often we cooked and washed our dishes we needed to fill up our tank every 3-5 days and our water tank capacity was 30 litres.
How to fill your water tank: Attach one end of the hose to the spout on your van and the other end to the water spigot. Turn on the water and fill until it starts to leak out the side.
Choosing a data plan in New Zealand
As soon as we got off the plane in Christchurch we were able to buy a SIM card and phone plan. However, we realized we hadn’t done any research about what provider provides the best rates. We ignored the airport data plans with Vodafone and picked one of New Zealand’s other providers, Skinny Mobile.
TIP: Don’t get lured into airport data plans even though it’s tempting. It’s usually not the best offer you can get.
We quickly learned that data is very expensive and free Wi-Fi is hard to come by. From the airport we walked 10 minutes to local grocery story called, Countdown and bought a $2 SIM card with Skinny Mobile. After you have the SIM card you activate your account and the data plan you want. We went with an unlimited 4-week data and calling plan for $75. We purchased only one plan and I hot spotted Kevin off my phone since we had unlimited data. No matter what provider you go with, the service in general is very spotty in most of the country aside from major cities.
Driving New Zealand
Driving in New Zealand in like driving in the UK – on the left. I am not a fan of driving so Kevin drove the entire North and South Island. In addition, there are a few other driving tips you should prepare for:
- Driving on the left side of the road: There are big arrows painted on the road to help you, but remember to take wide right turns and short left turns.
- Roundabouts: Just like driving on the left side, these can take a little getting used to. Slow down as you drive up to them and yield to the cars coming from the right.
- Speed Limits: Suprisingly, there are really only 2 speed limits in the entire country: 100 km/hr on the highways and 50 km/hr in the cities and towns.
- Moving over – If you’re in a larger campervan and you’re driving under the speed limit, you’re required by law to pull over if there are more than 4 vehicles lined up behind you. Most roads have passing lanes or dedicated “slow vehicle bays” so you can safely let others pass.
Important Road Signs
One-Lane bridges: These are very common throughout New Zealand. Make sure to yield when you approach and follow the signs on who should go across first.
Speed Derestriction: The speed limit is now the open road speed limit. This indicates the open road speed limit now applies for the vehicle you are driving. Typically the limit is 100km/h, but use your discretion based on your vehicle type.

Cooking in a campervan
Cooking in a campervan can be both fun and challenging. I say fun because enjoying your meals and cooking next to a great view makes some of the struggles worth it. While cooking is a cheaper option there are a few things to keep in mind. The cost of groceries is relatively expensive and you have to think about how much space you have in your fridge.
However, there are logistics when learning to cook outside. If you have an option to get a second burner, you should but they run on butane which gets used up very quickly (we went through 5 cans in 3 weeks). The wind is another factor you need to consider because it changes the temperature of the pan and slows cooking.
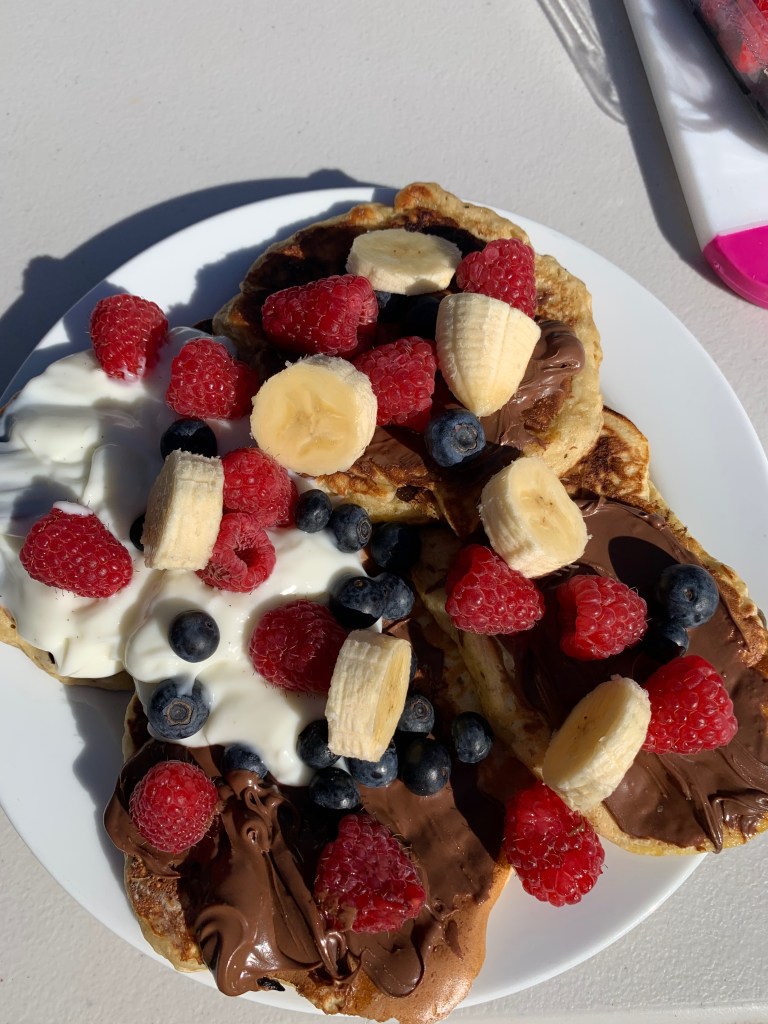
Breakfast: banana pancakes
For breakfast we had three ingredient banana pancakes: 2 medium bananas, 2 eggs & 1 cup self rising flour) which were both so easy and delicious. When it comes to cooking out of a campervan, the simpler the better.
Lunch: chicken fetas wraps (greek style)
Most days we tried to only cook twice a day because it takes a lot longer to wash your dishes without running water. When we went grocery shopping simple meals were always best. We purchased pre-cooked oven roasted chicken and made chicken wraps with greek salad inside. These were so delicious and so easy!

Dinner: chicken teriyaki stir-fry
Since we only had one burner, we opted for one pan dishes. One of our favourites is this chicken teriyaki stir fry for dinner. See below on how to make it.

Thanks for reading! Please don’t hesitate to contact me if you have any questions about costs, recipes, resources etc…by using the form below or emailing Sara Habibovic at:


Nice little overview of how to rent a campervan in New Zealand. we just stayed at motel – but a campervan might be a cheaper option.
LikeLike